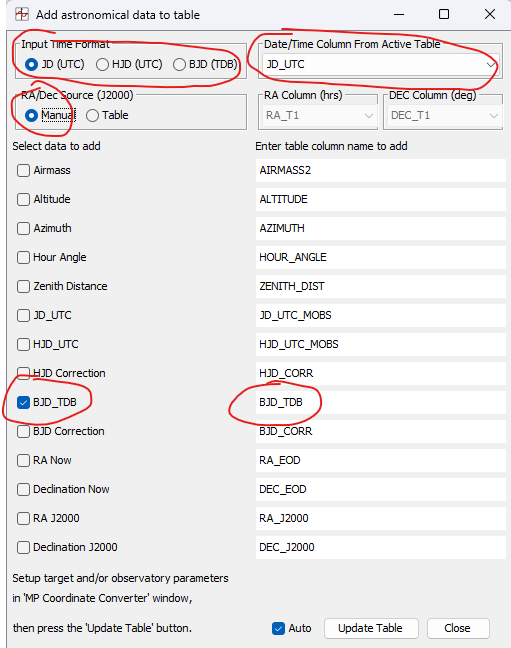
With a measurements table open in Multi-plot, select Multi-plot Main->Table->"Add new astronomical data columns to table..." (or click the "Add Data" button at the bottom-right of Multi-plot Main) and the dialog shown below will open, along with an instance of Coordinate Converter which has a window title of "MP Coordinate Converter". First, in the upper right selection box, select an existing Date/Time data column name from the active table. The time should normally be a mid-exposure time in the format of JD_UTC, HJD_UTC, or BJD_TDB. Then select the corresponding "Input Time Format" to the left of the selection box. Select the data column(s) to add to the table and change the default column name if desired. The option to add BJD_TDB is shown below.
DO NOT press "Update Table" yet.

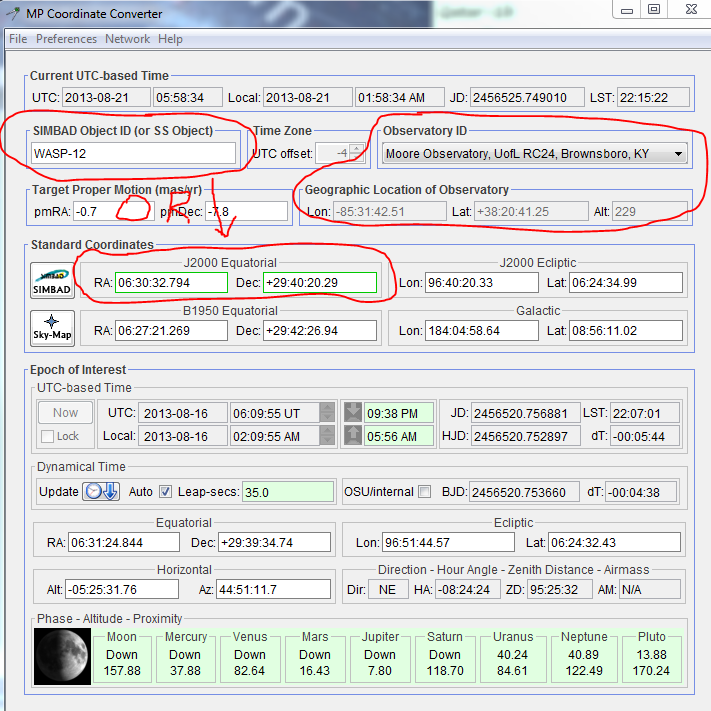
Now in the "MP Coordinate Converter" panel, add the target RA and Dec or a SIMBAD resolvable Object ID, and select your Observatory ID (or enter the observatory Latitude, Longitude, and Altitude by selecting "Custom Lat, Lon, and Alt entry" at the top of the Observatory ID list. All "Epoch of interest" (time) boxes are disabled. Time will be extracted from the table column identified above. If the measurements table contains columns for the RA and Dec of the target star, the "Table" option may be selected on the "Add Data" panel. In this case, the RA and Dec entries in MP Coordinate Converter will not be editable.

Now go back to the "Add astronomical data to table" panel and click "Update Table". The new data columns will be calculated from the existing time column, the target coordinates, and the geographic location of the observatory and added to the active measurements table. The plot panels may flash while the user interface is updated with the new data column names.
If you want to retain the new data columns, be sure to save the updated measurements table. The newly created columns can also be selected for output in the Multi-plot Main->"Save data subset to file.." dialog.
If you have the time format and type, RA/Dec of source, and your observatory's latitude and longitude set up correctly, then enabling the "Auto" option at the bottom of the "Add astronomical data to table" panel will cause the calculation of the selected values to automatically be added to the measurements table at the end of each Multi-aperture run.